whoamirunnerShell is a text based application for viewing, handling & manipulating files. It takes in commands and passes them on to the operating system. It is also known as
It is sufficient to know a handful of commands to get started with the shell.
Pick the first tier that fits you. All tiers run every command in this book, except where noted.
sudo chapter (sudo apt-get needs Linux) and the free command in the System Info chapter. For those two chapters, switch to the Tier 0 Posit Cloud project.sudo and free.Do not run book commands in Windows PowerShell. PowerShell aliases
lstoGet-ChildItemandcurl/wgettoInvoke-WebRequest, which reject standard Unix syntax. Always use Git Bash, WSL2, or Posit Cloud on Windows.
Note (macOS: Zsh default and BSD differences). macOS uses Zsh by default (since Catalina, 2019) and ships BSD coreutils instead of GNU coreutils. Book commands work the same, except:
head -n -5(negative counts),sed -i, and the output format ofcalanddate -ddiffer from Linux. When a result looks slightly different on your Mac, it is still correct.
Although we recommend the Posit Cloud project so that everyone uses the same environment, you should still know how to launch a terminal on your own machine.
Applications -> Utility -> Terminal
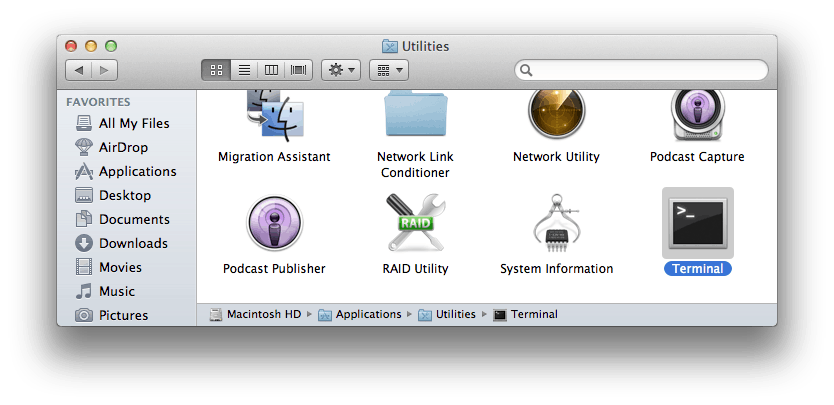
Install Git for Windows and launch Git Bash. Inside RStudio, select Tools -> Terminal -> New Terminal; if Git Bash is your configured terminal you can run every Tier 1 chapter right there.
wsl --install -d Ubuntu.You can learn more about the Windows Subsystem for Linux here.
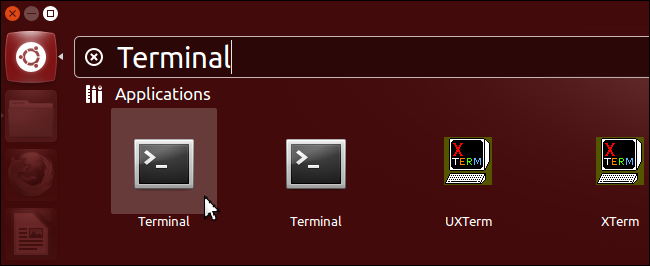
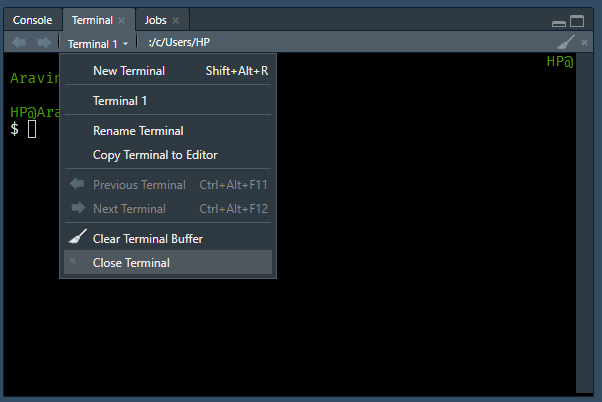
RStudio introduced the terminal with version 1.1.383. The terminal tab is next to the console tab. If it is not visible, use any of the below methods to launch it
Note, the terminal depends on the underlying operating system. To learn more about the RStudio terminal, see the terminal pane documentation in RStudio (Tools -> Terminal). In this book, we will use the RStudio terminal on Posit Cloud to ensure that all users have access to Linux bash. You can try all the commands used in this book on your local system as well except in case of Windows users.
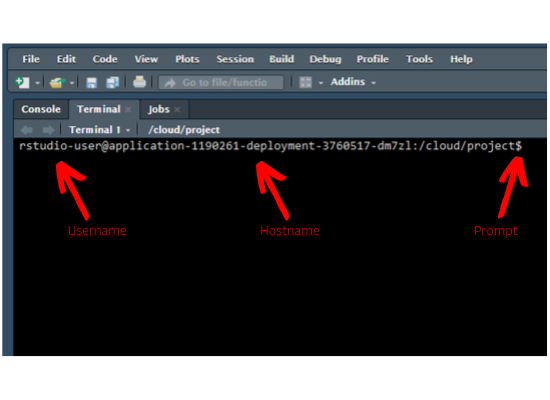
As soon as you launch the terminal, you will see the hostname, machine name and the prompt. In case of mac & Linux users, the prompt is $. For Windows users, it is >.
| OS | Prompt |
|---|---|
| macOS | $ |
| Linux | $ |
| Windows | > |
To begin with, let us learn to display
| Command | Description |
|---|---|
whoami |
Who is the user? |
date |
Get date, time and timezone |
cal |
Display calendar |
clear |
Clear the screen |
whoami prints the effective user id i.e. the name of the user who runs the command. Use it to verify the user as which you are logged into the system.
whoamirunnerdate will display or change the value of the system’s time and date information.
dateSat Oct 17 14:19:58 UTC 2026cal will display a formatted calendar and clear will clear all text on the screen and display a new prompt. You can clear the screen by pressing Ctrl + L as well.
cal October 2026
Su Mo Tu We Th Fr Sa
1 2 3
4 5 6 7 8 9 10
11 12 13 14 15 16 17
18 19 20 21 22 23 24
25 26 27 28 29 30 31
In R, we can get the user information from Sys.info() or whoami() from the whoami package. The current date & time are returned by Sys.date() & Sys.time(). To clear the R console, we use Ctrl + L.
| Command | R |
|---|---|
whoami |
Sys.info() / whoami::whoami() |
date |
Sys.date() / Sys.time() |
cal |
|
clear |
Ctrl + L |
Before we proceed further, let us learn to view the documentation/manual pages of the commands.
| Command | Description |
|---|---|
man |
Display manual pages for a command |
whatis |
Single line description of a command |
man is used to view the system’s reference manual. Git Bash ships no manpages, so if man is unavailable in your terminal, append --help to any command instead (works everywhere) and consult tldr.sh for practical examples.
man lsls --help | head -n 12Usage: ls [OPTION]... [FILE]...
List information about the FILEs (the current directory by default).
Sort entries alphabetically if none of -cftuvSUX nor --sort is specified.
Mandatory arguments to long options are mandatory for short options too.
-a, --all do not ignore entries starting with .
-A, --almost-all do not list implied . and ..
--author with -l, print the author of each file
-b, --escape print C-style escapes for nongraphic characters
--block-size=SIZE with -l, scale sizes by SIZE when printing them;
e.g., '--block-size=M'; see SIZE format belowwhatis displays short manual page descriptions (each manual page has a short description available within it). Like man, it needs the system manual database, so it is shown but not executed here.
whatis lsYou will find tldr.sh very useful while exploring new commands and there is a related R package, tldrrr as well.
# devtools::install_github("kirillseva/tldrrr")
tldrrr::tldr("pwd")whoami, then date, then cal one after another in your terminal. For each command, write down in one sentence what was displayed. Then run clear (or press Ctrl + L) and confirm you get a fresh empty prompt.ls --help | head -n 12. Identify one option flag mentioned there and write down what the help text says it does. Then try man ls — note whether it opens a manual page or reports no manual on your system (Git Bash ships no manpages; --help is the fallback).tldr ls if installed) and find one practical example for ls you had not seen in this chapter.Worked solutions in solutions/introduction.md (attempt first).